As an Amazon Associate we earn from qualifying purchases.

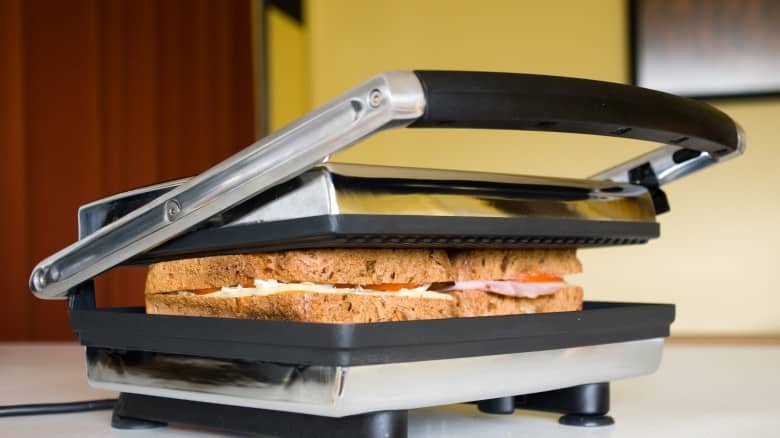
How to cook chicken in a panini press
We know a panini press to make our favorite Italian sandwiches (panini), but this nifty gadget can be used beyond just sandwiches.
It can also cook chicken!
Read on to find one of the greatest and easiest panini grilled chicken recipes, perfect for sandwiches or as a main on a bed of salad.
Can I Grill Chicken on a Panini Press?
Yes, you can absolutely grill chicken on a panini press!
Electrical panini presses are most commonly used to make a killer grilled sandwich, however, you might be pleasantly surprised to find that you can also grill chicken on this appliance.
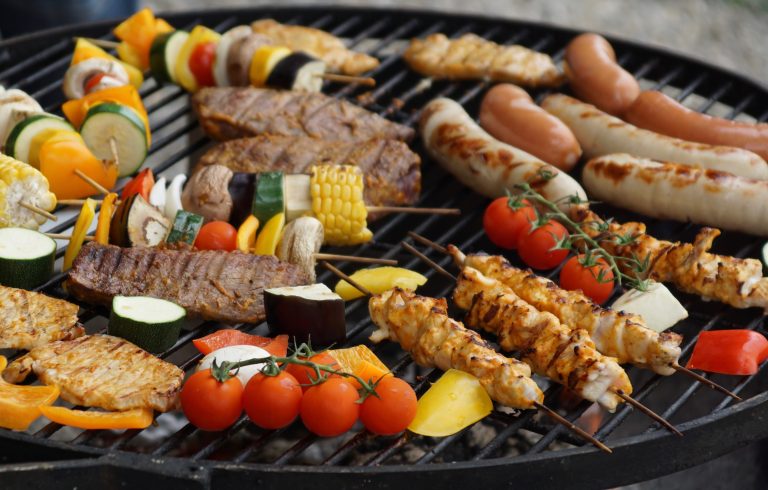
A press can also make those beautiful char marks that you usually get on your Z Grills or Traeger grills but in the comfort of your kitchen. Many people even refer to the press as an indoor grill. It only takes about 10 minutes to get a grilled chicken on the panini press.
You can also make vegetables of your choice or a grilled chicken sandwich.
Can Panini Press Cook Chicken?
You can make a quick chicken dinner using the panini press. However, it requires attention as it can cook fairly quickly.
Here is one of the simplest panini grilled chicken recipes anyone can try!
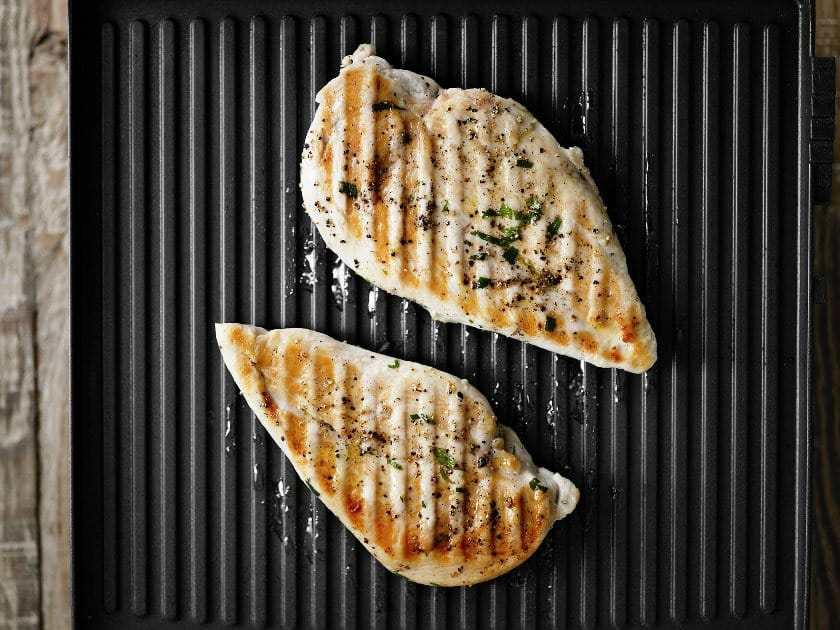
How To Cook Chicken on A Panini Press?
Since a panini press heats on both sides, you can get that perfect char mark on both sides. Before you start cooking your chicken, wash your panini press in hot, soapy water. Wipe your workspace and put any dishes that you’re not using away.
You’re going to need:
- Chicken fillets, cut in half
- Oil (vegetable or coconut)
- Seasoning
- Basting brush
Step1: Preheat your Panini Press
To make sure your chicken cooks evenly, preheat your panini press on medium heat for 3 to 5 minutes. To check if it’s ready, you can pour some water on it. If it sizzles, then you’re good to go!
Step 2: Prepare your Chicken
Make sure your chicken is defrosted before cooking. Pat the chicken fillets dry with a paper towel so that the chicken will sear. It will also prevent sticking to the panini press.
Season your chicken how you like. Usually, salt, pepper, and garlic powder are a common yet delicious combination for a chicken fillet. You can also add lemon to keep the fillets moist and full of flavor.
Step 3: Prep the Panini Press
Once the panini press is hot enough, use the basting brush to apply some vegetable or coconut oil. This will prevent sticking. You shouldn’t use flavored or olive oil as they will start smoking and ruin the chicken.
Lower the temperature before adding the chicken if the oil begins to smoke.
*Note! Not all panini presses have the same temperature, so you should use discretion when determining if the press is too hot.
Step 4: Grill!
Put your seasoned chicken on the panini press and close the lid. Press down on the fillet for about 20 seconds, then release slowly. Leave the chicken in the panini press and make sure it’s cooking at a medium temperature for 2 to 4 minutes.
Then lower the heat and let it look for 6 to 8 minutes, which should be enough since the chicken cut is fairly thin.
You can decide if the chicken is done by checking the following:
- If the cut of the chicken has contracted
- The juices are clear
- The middle is white when you cut it (you shouldn’t be eating pink chicken!)
You can also grill some vegetables if you like. You can use our grilled asparagus recipe!
When your chicken is done, you can serve it or wait for it to cool. You can store it in an airtight container, so it stays fresh. You can keep cooked chicken fillet for four days until it goes bad. So, savor it quick!
Optional: Make a chicken sandwich!
Since your chicken is already done, you can easily make a quick sandwich. This is also convenient as you use one pan for everything, so there are no extra dishes.
Chop up your chicken fillets or leave it as is. Add some butter to your bread and lettuce, and top that with a sauce of your choosing. Lay the chicken on the lettuce and top with cheese and tomato. Close the sandwich with the other slice of bread.
Put it in the panini press and press down for about 30 seconds. Leave it to the grill for 3 to 5 minutes.
How Long Does Chicken Take to Cook in the Panini Press?
Chicken fillets cooked in the panini press usually take about 10 to 12 minutes to cook, however, it depends on your cut of chicken and your panini press temperature. The thickness of the chicken also plays a big role in cooking times.
Tips When Cooking Chicken on a Panini Press
Here are some fool-proof tips to remember when cooking chicken on a panini press.
- Think about the cut of your chicken. You should opt for thin, boneless chicken that is less than 1 inch thick. Paillards are a good cut for this. The cut will ensure you get a juicy and cooked chicken without burning.
- Make sure your surfaces are clean, and you wash your hands before and after handling the chicken.
- Make sure to add oil to the panini press. It’s always a good choice to brush oil on the press before adding your chicken. This will prevent the chicken from sticking and make cleaning easier for you.
- Don’t limit yourself to just chicken! Aside from chicken, you can also make hearty vegetables such as mushrooms and eggplant to go with a chicken meal. If you’re making a sandwich, it can go back in the press for a toasty finish.
- Stick to dry spices such as salt, pepper, chili powder, and other combinations you have. The liquid marinade can leak out of the panini press, making a big mess and leaving your chicken dry.
- Dry your chicken before putting it on the panini press. You don’t want a dry chicken, however, if you aim for a brown crisp on the outside, you have to pat it dry.
- Don’t preheat the panini press on high, then lower the heat when cooking if you’re using a cast-iron press. This can cause sticking and ruin your chicken. You should also wait for the press to cool down if it’s smoking.
What are The Different Types of Panini Presses?
Before looking at how to cook chicken in a panini press, let’s have a quick look at the different types of panini presses.
Removable Plates
This panini press has reversible and removable plates, letting you use both sides. How cool! One side has grilling groves, while the other has a flat surface. You can choose to either grill or cook your chicken. Plus, it’s easy to clean.
[lasso box=”B00OHRLCX6″ template=”horizontal” ref=”george-foreman-4-serving-removable-plate-grill-and-panini-press-black-grp360b” id=”4885″ link_id=”4838″]
Cast-Iron
These plates are non-stick without the chemicals. You don’t have to add oil to these plates as your chicken won’t stick anyway, however, it’s up to you! They’re simple to use and also easy to clean.
Flat
These presses have flat and smooth plates only with no ribbing. This keeps even heat distribution. It’s not only for the perfect sandwich but also for the perfect chicken to go inside it!
Ceramic
These are non-stick and scratch-resistant, perfect for making sandwiches and cooking chicken. They do not have PTFE and PFOA chemicals, which keep your cooking healthy.
So, let’s get on to how to cook chicken in a panini press!
Panini Grilled Chicken Recipes: Conclusion
Following the above steps, you can make a one-pan quick and easy dinner for one or the whole family. The panini press is a unique cooking method since it uses the weight and heat distribution from the plates which perfectly sears the chicken. It’s like a grill, but smaller!