As an Amazon Associate we earn from qualifying purchases.
BBQ Grill Brush Cleaning and Safety Guide
Many grillers complain about their grill brushes introducing germs into their foods or not cleaning properly. For many complaints about BBQ grill brushes, the usual solution is to clean the brush.
The brush is for cleaning your grilling equipment, so it’s not a good mix for the cleaner to stay filthy. However, BBQ grill brush cleaning is no one’s favorite pastime.
When you attempt to clean your grill brush without proper guidance, you may end up hurting your hands or damaging the bristles or brush itself. Not to worry, I will show you an easy way to clean a grill brush without injuring your hands or ruining the grill brush.
The techniques for cleaning grill brushes with bristles and the types without bristles are only slightly different, and I’ll teach you both.
| Image | Title | Price | Prime | Buy |
|---|---|---|---|---|
 | Vgo... Chainsaw 12-Layer Saw Protection on Both Hands Cow Leather Gloves (Size M, Orange, CA9760) | PrimeEligible | Check Price | |
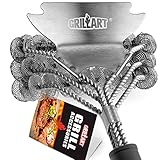 | Grill Brush and Scraper Bristle Free – Safe BBQ Brush for Grill – 18'' Stainless Grill Grate Cleaner - Safe Grill Accessories for Porcelain/Weber Gas/Charcoal Grill – Gifts for Grill Wizard | PrimeEligible | Check Price |
Prices pulled from the Amazon Product Advertising API on:
When to clean grill brush
You should clean your BBQ grill brush after using it twice at most. Hence, the frequency of cleaning your grill brush depends on how often you clean your grill.
This may not apply to people who grill rarely or mostly in the grilling seasons. You may use the brush to clean mild particles off your grill, so it may be okay to use it more than the recommended two times before cleaning the grill brush.
While we have no rule for grill brush cleaning frequency, if you look at the bristles or the brush and see food particles, that’s a sign that you should get ready to clean the grill brush.
In the same way, you may use the brush only once but to clean heavy dirt, oil, or smoke. In this case, you should clean the grill brush right away.
How do you clean a grill brush?
How to clean grill brushes with bristles
- Before proceeding, put on a pair of protective hand gloves.
- Remove obvious food particles from your grill brush by hitting the back of the brush on a solid surface. You can also do this by rubbing the bristles of two grill brushes together gently. For the best results, don’t use two metal bristle grill brushes for this. Preferably, one should be a nylon brush.
- Completely immerse the grill brush in a bowl or bucket of water.
- Add some detergent or dishwasher soap to the water.
- Squish the grill brush around in the water for a while. Doing this helps to lather the water as well as removes food particles in the grill brush.
- Allow the grill brush to absorb soap for around 15 minutes. You may leave it for longer to remove tougher particles.
- Remove the grill brush from the water and rinse it under running water.
- Dry the grill brush properly, especially if it has metal bristles to prevent it from rusting.
How to clean bristleless / bristle-free grill brushes
- Put on a pair of protective gloves.
- Remove obvious food particles from the grill brush by hitting the back of the brush on a solid surface. You are only banging the back of the grill brush and not the front so that you don’t bend the metal coils.
- Completely immerse the grill brush in a bowl of water.
- Add some detergent or dishwasher soap with grease-fighting agents.
- Firmly and quickly move around the brush in the water and swish it around for a few minutes.
- Allow the grill brush to soak and absorb soap for around 15 minutes.
- Remove the brush from the water and rinse it thoroughly under running water.
- Finally, hang the brush outside, so that the water drips away and the brush can air dry.

How often to replace grill brush
No amount of grill brush cleaning should stop you from replacing the brush when its time comes. Grill brushes are mostly inexpensive to purchase, and not replacing it when necessary can lead to serious health complications.
Two factors determine how often to replace grill brush – the state of the grill brush and the frequency of use. Inspect the grill brush visually to determine if grill brush cleaning is the way to go, or if it’s time to buy another one.
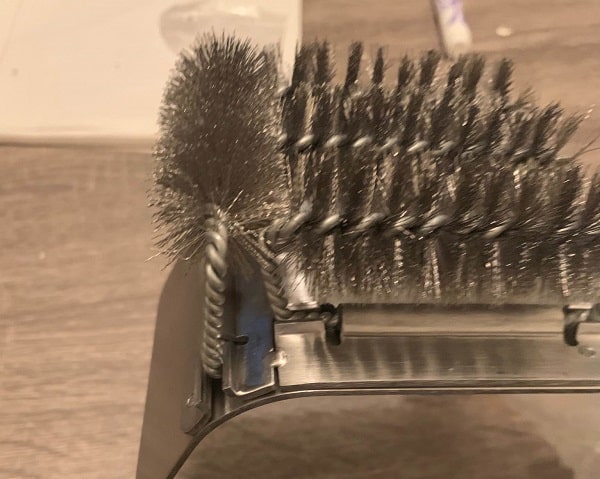
Using a bad grill brush can be hazardous. For example, the grill brush may have loose bristles. One of these loose bristles may make its way into your food, and you risk serious health complications.
What you can do to prevent this is to check for loose bristles using a plyer. Gently pull on random bristles of the grill brush. If can pull out even one bristle from the brush, you must discard the replace the entire grill brush.
Does your BBQ grill brush have cracked handles or other parts? Your grill brush has had it’s day if your answer is yes. You do not want to risk sustaining injury from the broken parts, or worse, the broken pieces getting into your food.
Another visual cue for changing your grill brush is when you notice that some bristles or wire coils are bent or crumpled. Although, this may not pose a serious risk to you, you should replace the grill brush because it can no longer serve its function, which is to clean your equipment.
The bent or crumpled bristles and wire coils mean that the grill brush can no longer clean corners effectively. Using a grill brush that’s in this state can also be detrimental for your grilling equipment.
Rust is another crucial factor that tells you if you’re grill brush is due for replacement. Rust is almost a given when you deal with metals. Don’t manage a BBQ grill brush that is plagued with rust.
It means that the BBQ grill brush has degraded. Your rusty grill brush is past the time for grill brush cleaning or maintenance. It now belongs in your trash.
Some people may suggest that you get rid of the rust and continue using the grill brush, but I don’t agree. Rusty bristles or wires are degraded and will break easily and get into your food.
As a rule of thumb, ensure to replace your grill brush every grilling season atleast. More frequent grillers should replace their grill brushes even more frequently.
BBQ grill brush cleaning and maintenance tips
I have explained why you must clean your grill brush and when to clean or replace it. We cannot neglect the regular maintenance.
Proper preventive maintenance will make your grill brush last long. Below are the most important grill brush cleaning and maintenance tips:
- Clean your grill brush regularly and don’t store it dirty.
- Don’t store your grill brush under direct sunlight.
- Don’t expose your grill brush to extreme atmospheric conditions, such as high temperature or moisture.
- When scrubbing your equipment with a grill brush, do it gently. Alternatively, use a grill scraper.
- Always visually inspect your grill brush before use. Check for obvious damage, such as loose or bent bristles, cracked parts, and rust.
- To avoid melting, always use grill brushes with nylon bristles on a cold grate.
- Use grill brushes with metal bristles for warm grates.

Conclusion
Cleaning a grill brush is a chore that you should not ignore, no matter how much you dislike it. The grill brush cleaning techniques we have discussed in this article will make your life so much easier.
To recap, I have shown you how to clean grill brushes with bristles and the bristles grill brushes. Not only that, this article also recommends when to clean the brush and when it is the right time to replace your grill brush.